![logo-primary-accent.png]](https://help.ecomap.tech/hs-fs/hubfs/logo-primary-accent.png?height=48&name=logo-primary-accent.png)
Not sure what a Case Type is? Read here difference between Contacts and Cases
1. First click on the Case Types Tab from the left sidebar menu in the Admin Panel.
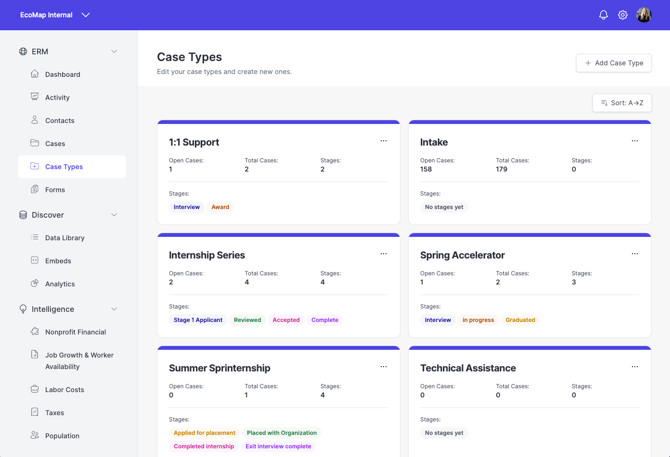
This is where all your Case Types live. You can see the number of cases of each type and the stages associated with that case.
Every configuration of ERM has at least one default Case Type: Intake.
2. To create a new Case Type, click the "+ Add Case Type" button in the upper righthand corner of the screen.
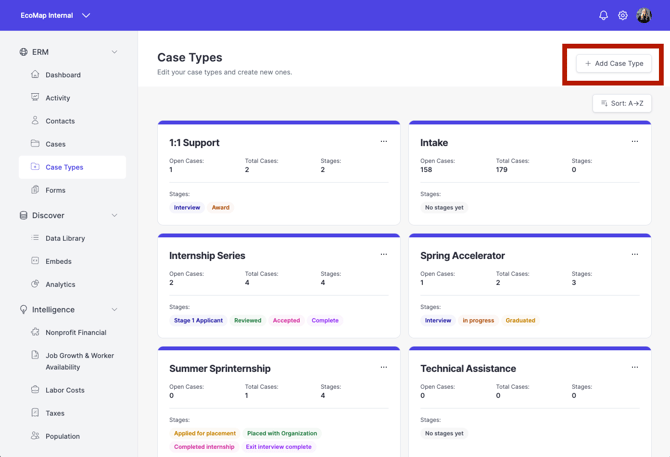
3. Complete the fields-- add a name, stages and select auto assigned Case Managers.
3.A. Adding Case Type Stages
The stages of the case should be the stages of the process or program you're running the entrepreneur through. This should help your team standardize the process, understand where an entrepreneur is in your pipeline of support, and understand the outcomes of your support.
Pro tip: Make the final stages outcome indicators for that case. In this example, one is "Funding Secured" the other is "No Funding Secured." This way, when you close your case, you can easily see the final outcome of that case.
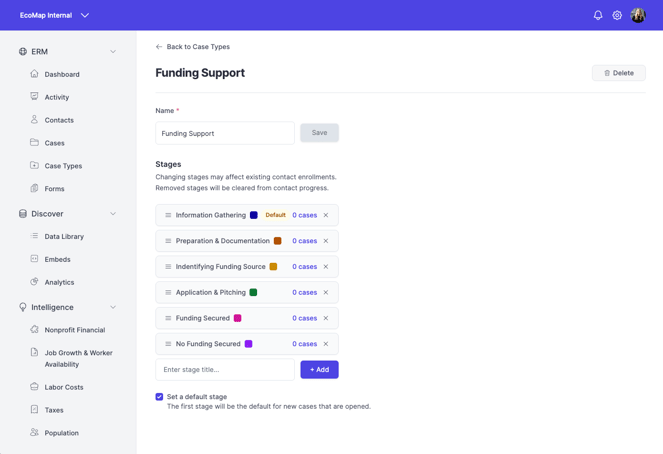
Select the "Set a Default Stage" checkbox to always attach the first stage to any new cases that have been opened. If you don't want the first stage to be attached automatically, leave this box unchecked. There will be no stage assigned to cases by default in that case.
3.B. (NEW) Automatic Case Manager Assignment: Toggle to turn on. If you choose to leave this off, you will have to assign a case manager every time.
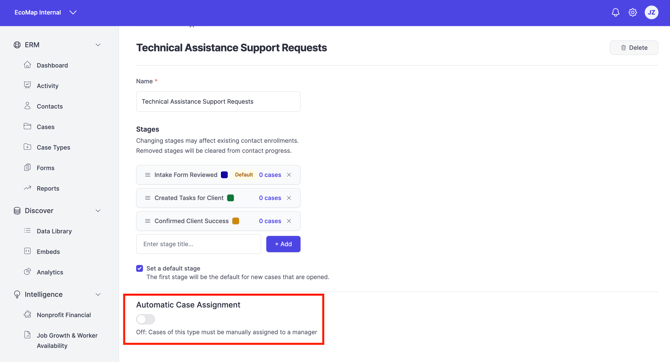
Once toggled on, select the preferred settings as prompted and add Case Managers to the configuration. 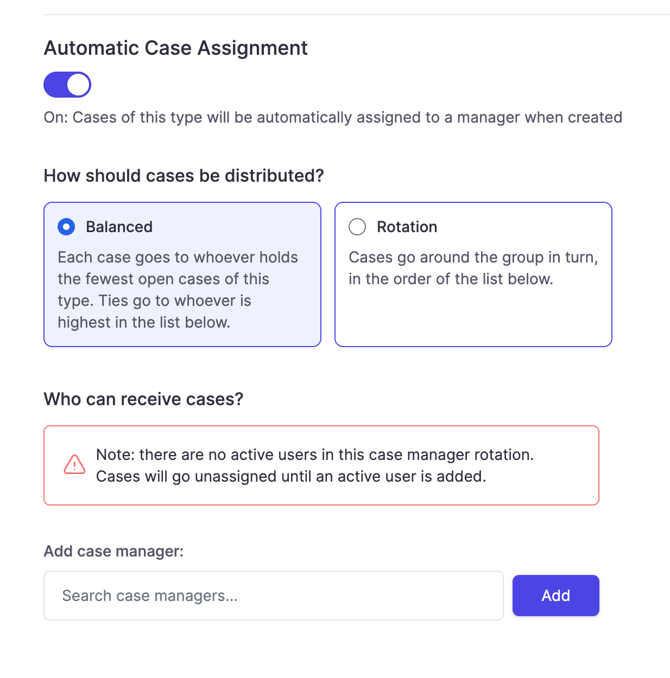 4. To edit an existing Case Type, click the three dots in the corner.
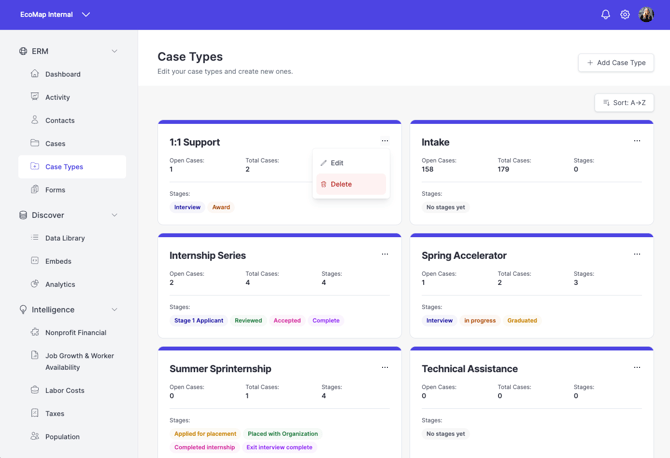
Changes are saved automatically. If you run into any issues please reach out to support@ecomap.tech.